The last time I was at my local farmer’s market, I noticed that there were huge heads of elephant garlic for sale. I bought several of them since we use so much of it in our daily cooking. The farmer said that the garlic was not only great for eating but also for growing your own garlic right in the garden.
While garlic can be grown in spring or fall, growing garlic in the fall is the most common method, at least around here. It starts with planting garlic cloves about a month before the last frost date and then basically ignoring it all winter.
Once spring arrives, the garlic starts growing again and is ready to harvest by early summer. From there it is just harvesting, curing, and storing your harvest for use all year long! Below I will give more details about how to grow garlic in the garden as well as a few garlic recipes you might want to try.
Fresh garlic is so much more flavorful than grocery store garlic. It is well worth the effort required to grow a crop of garlic in the garden!
Posts feature partner companies & may be sponsored. Post contains affiliate links & I will be compensated if you make a purchase after clicking on links. As an Amazon Associate I earn from qualifying purchases.
Table of Contents
Tips For Growing Your Own Garlic
Edible gardening doesn’t have to be complicated but you do need to do a bit of research before you get started. If you enjoy fall gardening, garlic is the perfect crop to plant. And if you are looking for more fall gardening ideas, check out my post on what to plant in November for a few suggestions. If you want to give this a try in your own garden, here are a few tips that might help.
Here are a few tips for to help you grow and harvest garlic this year.
Choose a sunny spot in your garden with well-drained soil.
One of the best things you can do when growing garlic is to choose the right type of soil. Garlic thrives in loose, well-drained soil that is high in organic matter.
The ideal pH range for garlic is 6.0 to 7.0. If your soil is too acidic or too alkaline, it can affect the flavor of your garlic. If you’re not sure what the pH of your soil is, you can have it tested by a professional or buy a testing kit from a garden center.
In terms of nutrition, garlic needs nitrogen, phosphorus, and potassium to grow well. A good way to ensure that your garlic has all the nutrients it needs is to use a fertilizer designed for vegetables.
Follow the instructions on the packaging for how much and how often to apply it. With the right soil and nutrients, you’ll be well on your way to growing delicious garlic!
How to plant garlic cloves
Garlic is typically planted in the fall, about six weeks before the first frost. This gives the plants time to establish themselves before winter sets in.
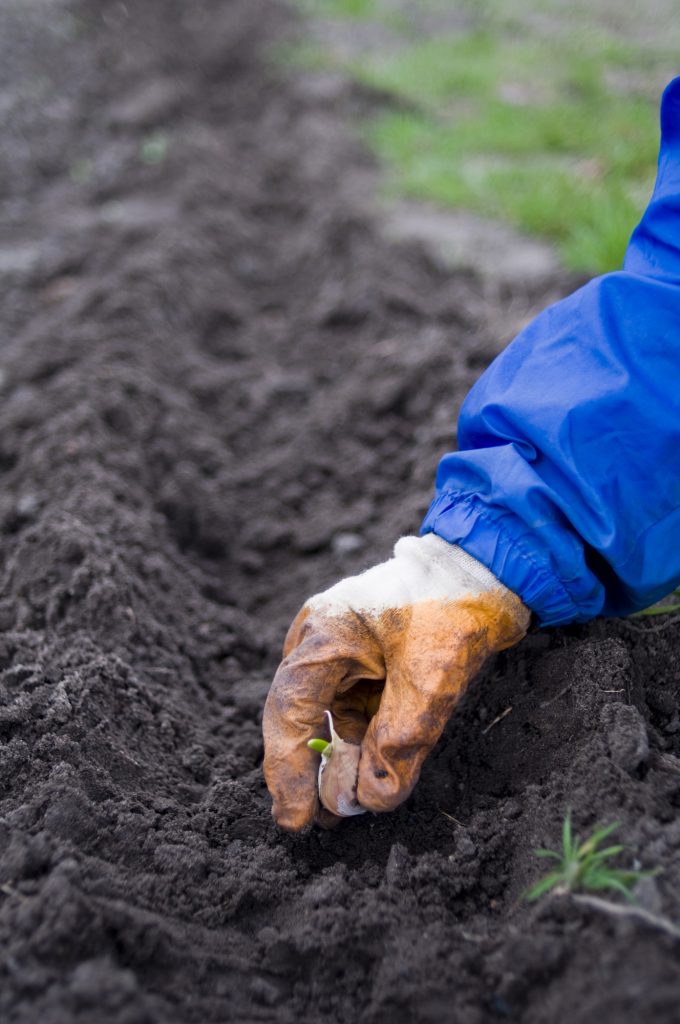
When you’re ready to plant, take a look at your garlic cloves and choose the biggest and healthiest ones. These will give you the best results when it comes to growing.
Next, loosen up the soil in your planting area and make sure there are no rocks or other debris that could interfere with the roots. Once the area is prepared, you can start planting your garlic cloves.
Plant each one about two inches deep and four inches apart. After you’ve planted all your cloves, water them well.
Once your garlic is planted, there’s not much to do in terms of care. You’ll need to weed around the plants periodically and make sure they’re getting enough water.
Water regularly, especially during dry spells.
If you live in an area with a lot of rain, you may not need to water your garlic again until spring. If you live in a drier climate, however, you’ll need to keep an eye on the soil and water as needed to make sure it doesn’t dry out.
Let them grow
Garlic is a pretty low-maintenance crop. In the spring, you may see green shoots coming up from the ground. These are called garlic scapes, and they’re actually the flower stalk of the plant.
You can cut them off if you want, but they’re also edible and quite tasty! Just wait until your garlic is about six inches tall before you start harvesting the scapes.
Harvest garlic when the tops start to turn brown.
After harvesting, cure garlic in a cool, dark place for 2-3 weeks before storing. (more about this below!)
With a little patience and care, you can enjoy a bounty of homegrown garlic!
✯Don’t want to miss the next post?✯ Follow Turning the Clock Back on Facebook | Twitter | Pinterest Or join the private Facebook group for simple tips on going green! 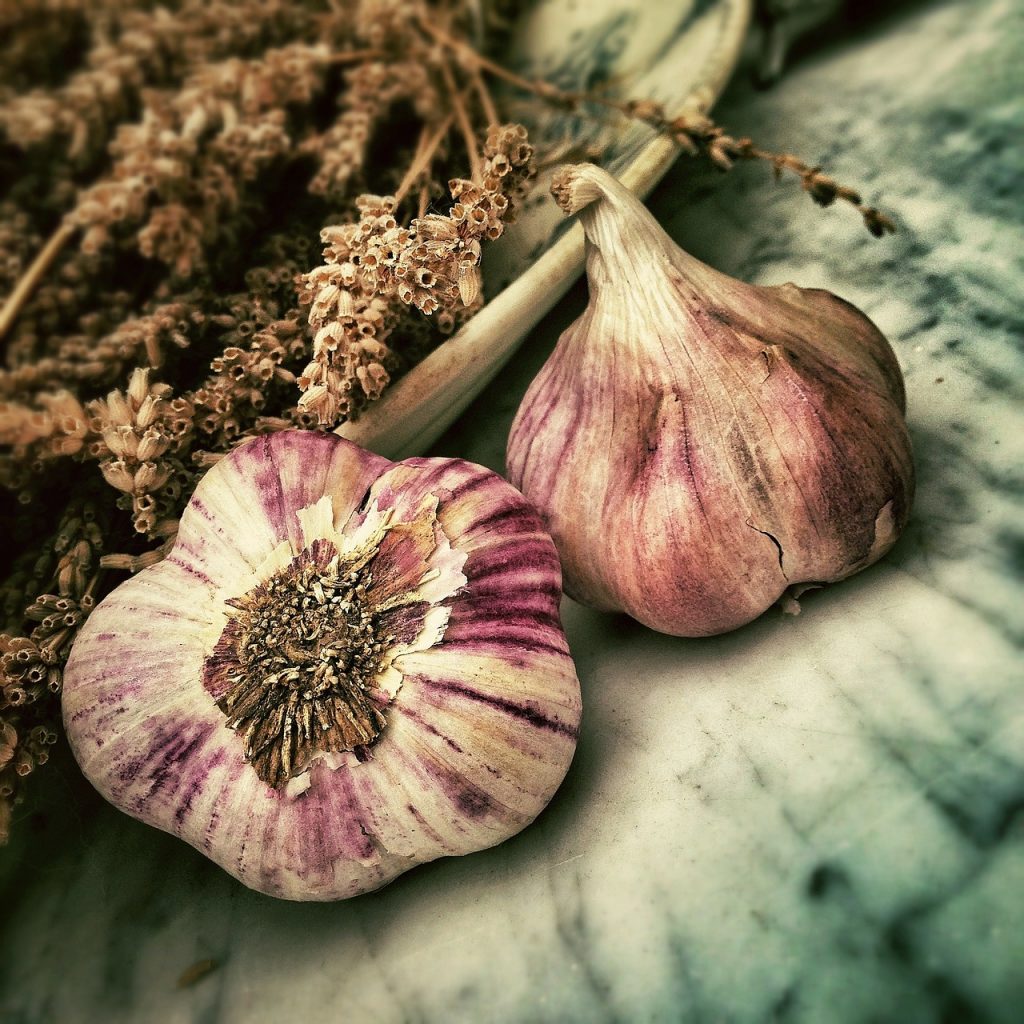
Which Garlic Variety Should You Plant?
Who knew there were so many types of garlic? Rocambole, Purple Stripe, Porcelain, Artichoke, Silverskin, Asiatic Turban and Creole. The most important difference is between softneck and hardneck. If you want to grow garlic, you need to know which one to plant.
Softneck vs Hardneck garlic
Softneck garlic is so called because the whole green plant dies down to pliancy, leaving nothing but the bulb and flexible stems that are easy to braid.
Hardneck garlic has a stiff stem in the center that terminates in a beautiful flower – or cluster of little bulbs – then dries to a rigid stick that makes braiding impossible.
*Softnecks do better in mild southern climates, hardnecks in cold northern climates although they will both grow anywhere. They may just not do as well.
Planting Garlic
Dates for planting garlic are going to depend on where you live. In general, plant garlic bulbs in mid-fall. (mid to late October) Either buy heads at the farmer’s market or buy organic garlic on Amazon.
It needs to be organic. Otherwise, they have been sprayed with sprouting inhibitors. Insert individual cloves root side down about 6-8 inches apart in all directions in loose, fertile soil. Bury the tips about two inches down.
They will sprout a little but die when they freeze. Keep mulched and water only as needed throughout winter. (obviously, if there is snow on the ground, you can’t water!)
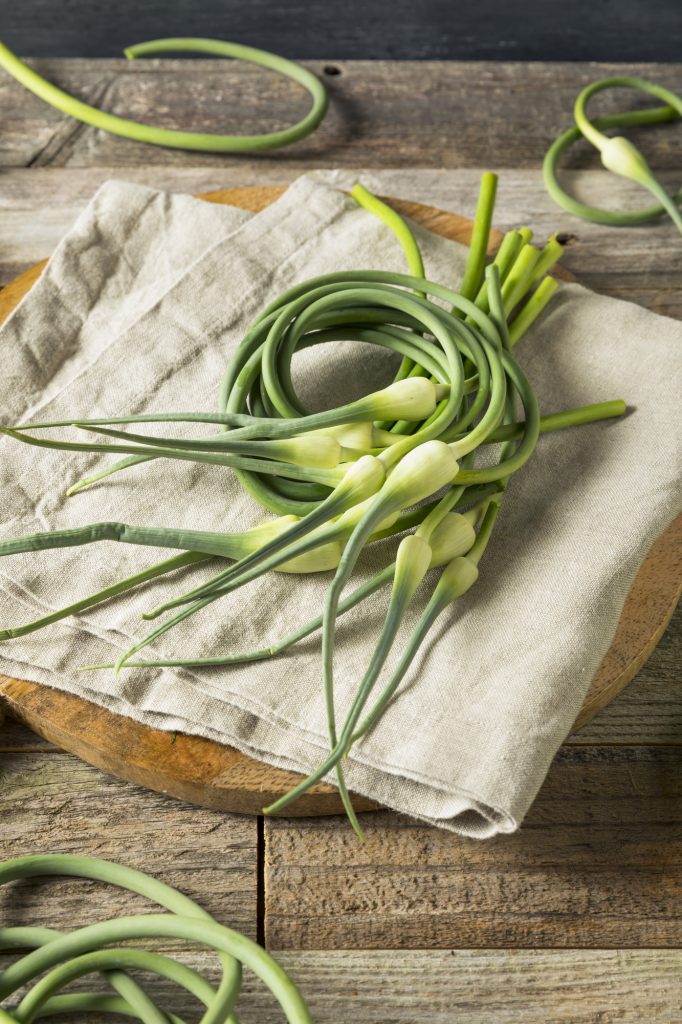
Cutting Garlic Scapes
Scapes are those little curly bud-type things that are growing up from your plant. Trim when they are small and you can eat them and they are nice and tender. Trimming them off is supposed to increase yield, forcing more energy down to the root. While they may look like strange and unappetizing vegetables, they actually have a lot of culinary uses. Here are some ideas for what to do with garlic scapes:
- Chop them up and add them to salads, soups, or stir-fries.
- Puree them and use them as pesto or sauce for pasta or pizza.
- Pickle them for a tangy and flavorful addition to sandwiches or burgers.
- Roast them with other vegetables for a delicious and healthy side dish.
So don’t be afraid to give garlic scapes a try – they may just become your new favorite ingredient! Check out this post on how to preserve garlic scapes if you have a ton of them. Use small pruning shears to cut them or your homework scissors will smell very garlicky!
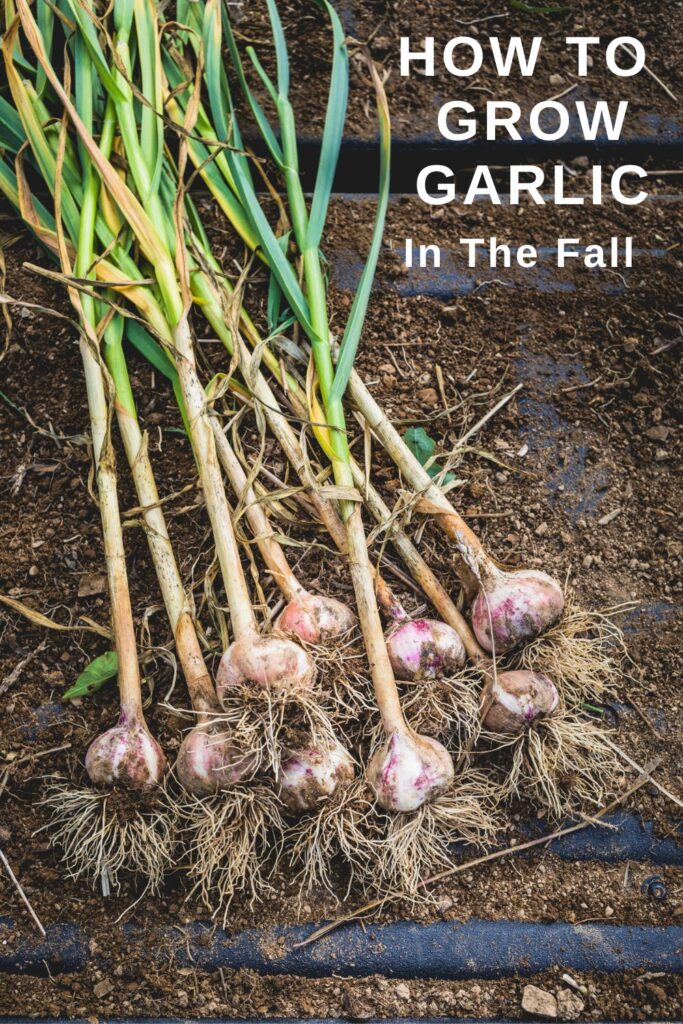
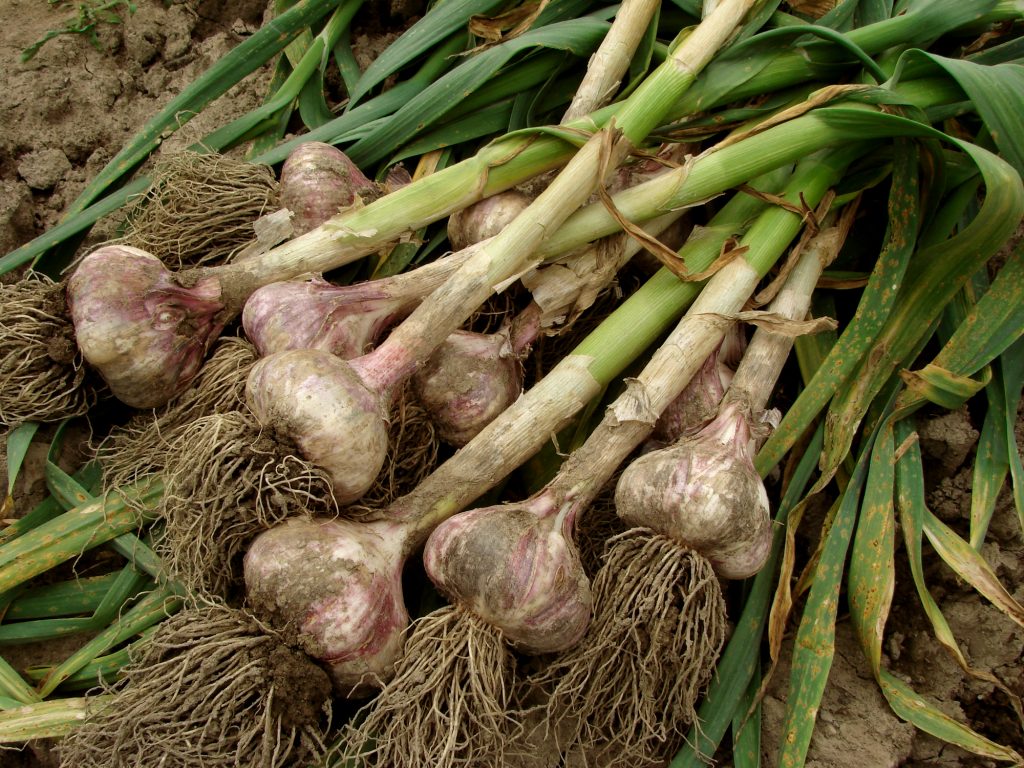
Harvesting Garlic
The bulbs are ready when most of the lower leaves have browned. The upper ones will still be green. This depends a lot on the type of garlic you planted and your weather. Garlic varieties are either early, midseason, or late and if it is hot early, they will grow faster than if you have a long winter. Watch the leaves and maybe pull one up and see how it is growing. You can eat the one you sacrificed!
You want to harvest on an overcast day when the soil is relatively dry. To harvest, simply pull the garlic plant out of the ground. Gently brush off any excess dirt and let the garlic heads dry in a cool, dark place for a week or so. Once they are completely dry, you can store them in a paper bag in a cool, dry place for several months.
How To Cure Garlic
There are many ways to cure garlic and the method you choose is really just a matter of preference. However, it is essential that you get it right or you risk losing your entire harvest. The process of curing garlic will take 2 to 3 weeks. While you can eat it at any time after you harvest it, the flavor won’t be fully developed until the curing process is complete. So, here are a few garlic curing methods to try:
Curing garlic in bulb crates
This is probably the most common method of curing garlic. Simply pull up the bulbs and brush off any dirt. Cut the roots and green tops off, leaving about an inch or two of the stem attached to the bulb.
Place the garlic in a well-ventilated crate or basket, with the bulbs pointing up. Store the crate in a cool, dry place out of direct sunlight. Check on the garlic every few days, and turn any bulbs that are starting to brown. After 2-3 weeks, your garlic will be cured and ready to use.
Hanging garlic to cure
This method is similar to the crate method, but instead of storing the garlic in a crate, you hang it up. Cut the roots and green tops off the bulbs, leaving about an inch or two of the stem attached.
Make a small hole in the stem and thread a string through it. Tie the string to a beam or other support in your garage or basement, making sure that the bulbs are not touching each other. Make sure to hang it in a cool, dry place out of direct sunlight.
Check on the garlic every few days, and turn any bulbs that are starting to brown. After 2-3 weeks, your garlic will be cured and ready to use.
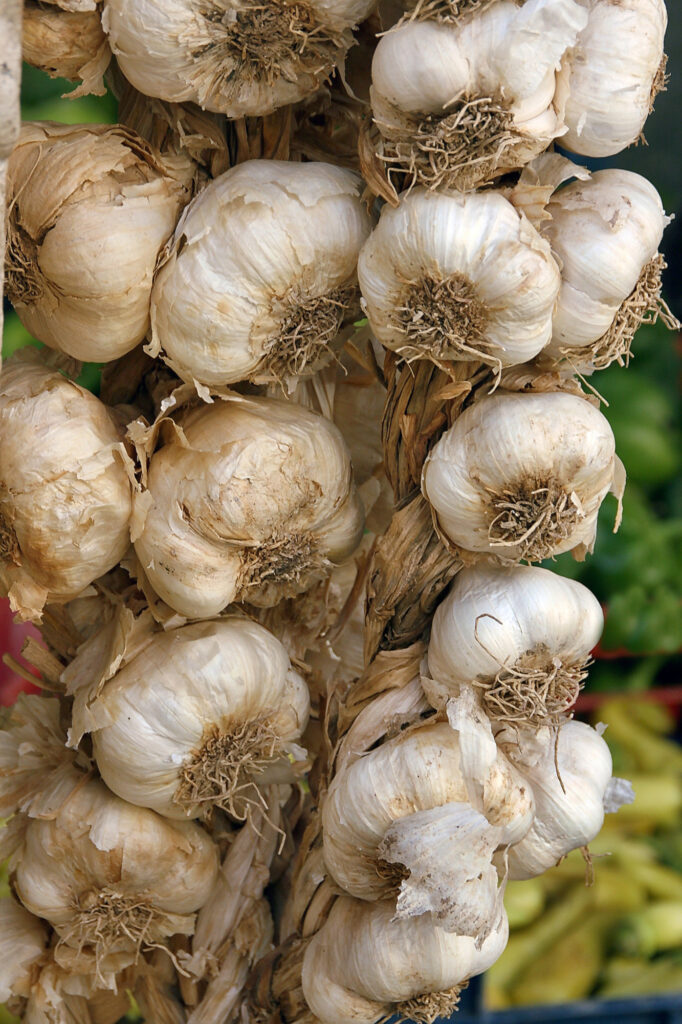
Curing garlic in braids
This is a popular method for small harvests, or for garlic that you want to be able to store for a long time. Cut the roots and green tops off the bulbs, leaving about an inch or two of the stem attached.
Braid the garlic stems together, and hang them in a cool, dry place out of direct sunlight. Check on the garlic every few days, and turn any bulbs that are starting to brown. After 2-3 weeks, your garlic will be cured and ready to use.
Can you wash garlic bulbs with water before curing them?
There is some debate about washing garlic before curing it. While some people recommend it to clean off excess dirt, you introduce a significant amount of moisture to your garlic which can lead to mold issues.
Ideally, skip the washing step. Instead, brush any dirt off the bulbs and trim the roots and tops as described above. Then, place the bulbs in a well-ventilated area to cure.
Once your garlic is cured, you can store it in a cool, dry place for up to 6 months. Enjoy!
Storing Garlic
For whole garlic cloves, store them in someplace with cool temps (NOT the refrigerator!), low humidity, in light (but not direct sunlight). Maybe a basket in the pantry? You can also check out this University of California’s article on how to safely preserve garlic.
Now that you know how easy it is to grow garlic, why not give it a try this year? There are so many great recipes to use garlic in and it has some amazing health benefits!
Garlic growing basics for containers
Even if you don’t have a lot of space in the yard to plant garlic, you can still grow those tasty bulbs yourself by growing garlic in containers.
What kind of container should you use for garlic?
Just about any type of container will work for growing garlic, as long as it’s at least eight to ten inches deep and has drainage holes.
What type of soil should you use for garlic?
Garlic grows best in loose, well-drained soils that are high in organic matter. If you are growing garlic in containers, make sure to use a high-quality potting mix that is designed for vegetables. You can also add some compost or other organic matter to the mix to help improve drainage and add nutrients.
The directions for planting garlic bulbs in containers are the same as in the ground. Place individual cloves at least 3 inches apart, pointy side up, and placed about 2 to 4 inches deep. Choose plump cloves if you only have space for a few in your pot.
How much sun does garlic need?
Garlic likes full sun, so make sure to choose a spot for your container you’re growing garlic in containers, make sure to choose a spot that gets at least six hours of sunlight a day.
Just like when you plant garlic bulbs in the ground, keep it watered but not wet, and fertilize it once it sprouts in the spring. Garlic plants are very cold hardy and can tolerate temperatures well below freezing.
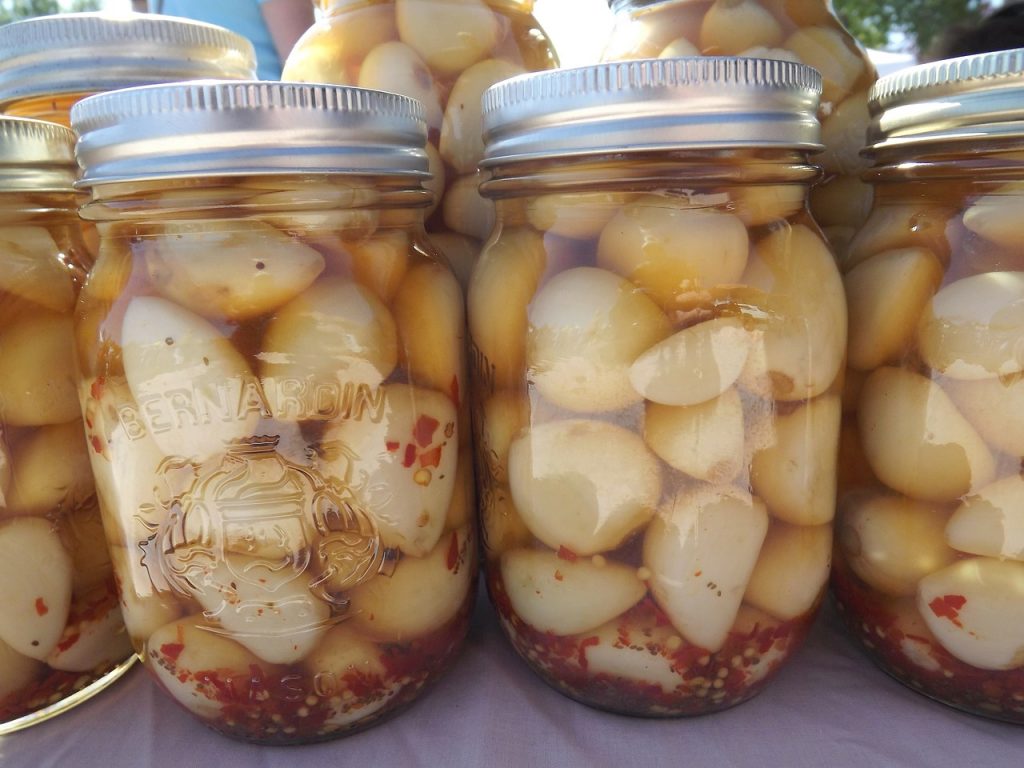
Garlic Recipes to Try
Looking for a few recipes using garlic now that you have so much? Check out my post on how to roast garlic or make my delicious garlic ginger freezer pickles. And I definitely recommend my homemade tzatziki dip with cucumbers and garlic.
Will you plant garlic this fall?
Like this post? Pin it for Later!


Diane is a professional blogger and nationally certified pharmacy technician at Good Pill Pharmacy. She earned her BS in Microbiology at the University of New Hampshire and has worked in cancer research, academics, and biotechnology. Concern over the growing incidence of human disease and the birth of her children led her to begin living a more natural life. She quickly realized that the information she was learning along the way could be beneficial to many others and started blogging and freelance writing to share this knowledge with others. Learn more about her HERE.