When my children were young, we spent a lot of hours going on nature hikes. During out time outdoors, we collected tons of rocks for nature crafts. And, of course, they learned quite young how to paint rocks and turn them into amazing works of art. If you have found some rocks this week, I thought I would share some rock painting instructions to help you and your child create rock art masterpieces! It’s a great way to decorate with natural elements around your home.
Posts feature partner companies & may be sponsored. Post contains affiliate links & I will be compensated if you make a purchase after clicking on links. As an Amazon Associate I earn from qualifying purchases.
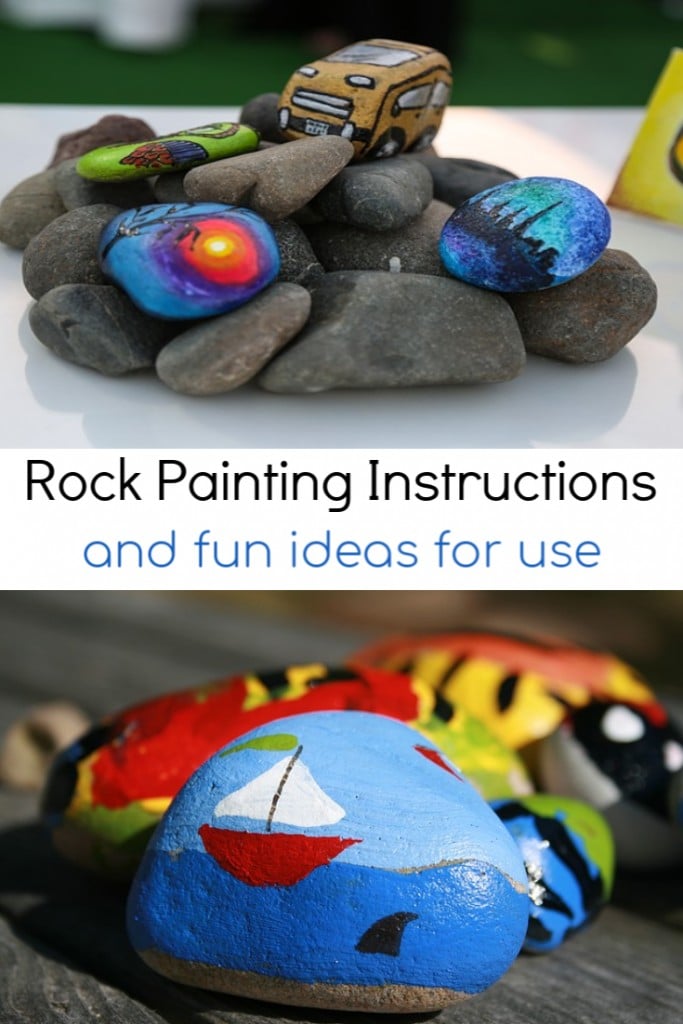
Table of Contents
How do you prepare rocks for painting?
Once you find rocks, you need to prepare them for your painting project. Preparation is key for a beautiful rock art project! Here are some rock painting instructions to follow for preparing rocks for painting:
- Wash rocks with soap and water.
- Scrub rocks with a stiff bristled brush to get all the dirt out of the crevices.
- Make sure you let the rocks dry completely, preferably overnight, before painting them.
- Prime the stones with one or two coats of acrylic primer.
- You can smooth Elmer’s wood filler over a rock’s holes to even it out before priming if you want.

✯Don’t want to miss the next post?✯
Follow Turning the Clock Back on Facebook | Twitter | Pinterest
Or join the private Facebook group for simple tips on going green!
What is the best paint to use on rocks?
Painting rocks is a lot of fun and you want your creation to last a long time. What paint should you use for your rock painting craft? Use acrylic paints or a paint made for outdoor use. Those paints are made to handle porous surfaces, like rocks, and weather the outside elements. Can you use markers to paint rocks? Well, yes, but you won’t really get a long lasting or truly vibrant look to your rock craft. Before you start your project, stock up on these supplies and follow the rock painting instructions below.
Rock Painting Supplies
- Acrylic Paint Pens for Rock Painting: Water-based, non-toxic,without strong smell,safe and kid-friendly.
- Aleene’s Spray Gloss Finish: Acrylic sealer spray provide a protective, clear finish
- Apple Barrel Acrylic Paint Set: All-purpose acrylic craft paint is water based, non-toxic and dries to a durable finish
- Creativity for Kids Hide & Seek Rock Painting Kit: Rock painting kit for kids: spread kindness and positivity by painting and hiding rocks throughout your community.
- Paint pens for Rock Painting: Vivid, water-based ink that dries quickly to produce a very durable opaque and glossy finish
- Rock Art Handbook: Rock painting instructions, techniques and projects for painting, coloring, and transforming stones

What do you use to seal painted stones?
Once you have your paint layer on, you will need to let the stones dry overnight. But, you aren’t done yet! Painted rocks should be sealed in order for them to last as long as possible without chipping or fading.
More Easy Craft Ideas
- Save the Pollinators with a Honeybee Watering Station in the Garden!
- How to Repurpose Old Wooden Spoons Instead of Throwing Them Away!
- Easy Terra Cotta Pumpkin Craft
The best way to seal rocks painted with acrylic paint is to use a spray sealer. Some acrylic paints are self-sealing and won’t need this final step. Read the instructions on the back of your acrylic paint package to decide if you want to seal them or not. You will have to use the spray sealer on the top of the rock, let it dry, and then flip it over to do the bottom.
How do you smooth stones?
As mentioned above, if your stones have holes or imperfections, you can fill them with wood filler before painting. But how do you smooth stones if you don’t want to fill in the cracks? If you just need to polish rocks a small amount, you can use a coarse sand paper. Wet the stone first, and then sand with coarse sand paper.
If you really want a polished surface for your rock painting project, you may need to invest in a rock tumbler. How long does it take to tumble rocks? Tumbling rocks until they are smooth generally takes between one and two weeks. Once they are totally smooth, follow the rock painting instructions above.

The Kindness Rocks Project
Want to turn your love of painting rocks into a mission with purpose? Have you heard of the Kindness Rocks Project? The Kindness Rocks Project encourages people to spread positivity by leaving a rock with an inspirational saving in public for someone to find.
Basically, it’s just people who paint rocks, and then hide them somewhere. Then if you find a rock, you can replace it with one you’ve painted, or hide it in a different place. It’s a great rock painting idea for kids to help them become more compassionate humans.

Boost Creativity with Story Stones
Making story stones is a great way to boost creativity in kids. Your homemade story stones can be used to guide a story, teach a lesson, or just let kids be creative. Kids can create a story with stones that have pre-printed words on them. Check out Happy Hooligan for tips on how to make story stones for kids.
How do you use Story Stones?
- Put them in a bucket for your next long distance road trip
- Leave them around your house for free play.
- For directed play, choose a stone from a bag have kids tell or write a story about that stone.
- Sort your stones into characters, settings and objects to teach grammar and writing lessons.
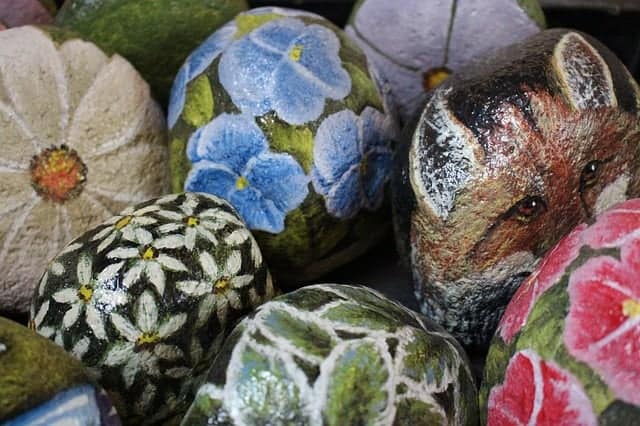
Rock Painting Ideas
So, you found a rock and now you want to paint it. Knowing these rock painting instructions is helpful but how do you actually get started creating a work of art? Before you start painting your rock design, paint a white base layer so colors appear more vibrant. Let the shape of the rock guide your creative process. What shape does it remind you of? Work on multiple rocks at one time so that when one is drying, you can paint another one.
Have any other rock painting tips and ideas to share?

Diane is a professional blogger and nationally certified pharmacy technician at Good Pill Pharmacy. She earned her BS in Microbiology at the University of New Hampshire and has worked in cancer research, academics, and biotechnology. Concern over the growing incidence of human disease and the birth of her children led her to begin living a more natural life. She quickly realized that the information she was learning along the way could be beneficial to many others and started blogging and freelance writing to share this knowledge with others. Learn more about her HERE.