Have you ever wondered what to do with those leftover ceramic tiles after a home project? They’re taking up space in your garage or storage room, and you hate the thought of throwing them away.
If you are wondering what to do with leftover ceramic tiles, I am going to share a few creative ideas and practical projects that allow you to repurpose them and turn them into something beautiful. Say goodbye to wasted materials and hello to stunning DIY creations!
There are tons of ceramic tile craft ideas to try your hand at. From fridge magnets and tile coasters to a tile-covered kitchen island, decide which great project you want to tackle by considering how much leftover tile you have to work with. You also need to take into account if they are all the same color or if you have a wide variety of patterned tiles to choose from.
Posts feature partner companies & may be sponsored. Post contains affiliate links & I will be compensated if you make a purchase after clicking on links. As an Amazon Associate I earn from qualifying purchases.

Table of Contents
What type of tiles are you working with?
Some of these clever DIYS will work best with certain types of tiles. Some have a mesh backing and others need tile adhesive to stick to anything. Are they ceramic or glass tiles? Maybe you have porcelain or tile sheets. Keep these things in mind while contemplating your home improvement or DIY project.
Can ceramic tile be reused?
While this post is mainly about using LEFTOVER tile, if you have old tile that you have removed from your home, you can still clean and reuse it. Clean the tile with a cleaner meant for ceramic and stone first.
Once it has been cleaned, you can apply some adhesive to attach it to any other surface you would like. Since most tile has been applied with grout, you may not be able to reuse whole tiles but may have to break them into pieces first.

✯Don’t want to miss the next post?✯
Follow Turning the Clock Back on Facebook | Twitter | Pinterest
Or join the private Facebook group for simple tips on going green!
Tips for Painting Old Tiles
✯Don’t want to miss the next post?✯
Follow Turning the Clock Back on Facebook | Twitter | Pinterest
Or join the private Facebook group for simple tips on going green!
If you want to reuse old tiles, they may need a bit of color added to them first. Painting ceramic tiles can be a good first step. If you’re planning to use the painted tiles outdoors, it’s essential to ensure they are weatherproofed to withstand the elements. Here’s a step-by-step guide:
Materials You’ll Need:
- Leftover tiles
- TSP (Trisodium Phosphate) or a similar heavy-duty cleaner
- Sandpaper (150-220 grit)
- Primer suitable for ceramic surfaces
- Outdoor-rated acrylic paint or tile paint
- Paintbrushes (synthetic bristle brushes work well
- Clear weatherproof sealer or urethane
- Painter’s tape (if creating a design)
- Drop cloths or old newspapers
- Protective gloves and eyewear
Step-by-Step Guide:
1. Clean the Tiles:
Start by thoroughly cleaning the ceramic tiles to remove any dirt, grease, or residues. Mix TSP or a similar heavy-duty cleaner with water according to the manufacturer’s instructions. Use a scrub brush to clean the tiles, then rinse them with clean water and allow them to dry completely.
2. Sand the Tiles:
Lightly sand the tiles with sandpaper (I suggest 150-220 grit sandpaper) to create a slightly rough surface. This helps the primer adhere better to the tiles.
3. Apply Primer:
Using a paintbrush or roller, apply a thin and even coat of primer designed for ceramic surfaces. Allow the primer to dry according to the manufacturer’s instructions.
4. Paint the Tiles:
Once the primer is dry, you can start painting the tiles with your chosen outdoor-rated acrylic paint or tile paint. Apply the paint using smooth, even strokes. You may need to apply multiple coats for complete coverage, allowing each coat to dry before applying the next.
5. Design and Tape (Optional):
If you’re creating a design on your tiles, use painter’s tape to mask off the areas you want to keep unpainted. Make sure the tape adheres well to prevent the paint from bleeding.
6. Seal the Paint:
Once the paint is completely dry and you’re satisfied with the coverage, apply a clear weatherproof sealer or urethane to protect the paint from moisture and weathering. Follow the manufacturer’s instructions for application and drying times.
7. Cure and Dry:
Allow the sealer to cure and the tiles to dry for the recommended time. This step ensures that the tiles are fully protected and ready for outdoor use.
8. Install or Display:
After the tiles are completely dry, you can install them in your desired outdoor location or display them as decorative pieces.
Remember, even with weatherproofing, it’s a good idea to avoid exposing the painted tiles to extremely harsh weather conditions, such as extreme heat or freezing temperatures. Regular maintenance and reapplying a clear sealer every couple of years can help prolong the life of your painted tiles.

How to break tile safely
If you need to use pieces of tile rather than whole ones, please be careful. To break a tile safely, wear safety goggles and gloves for protection.
For smooth edges of defined size, score the tile’s surface along the desired break line using a tile cutter or a glass cutter, then place the scored line over a straight edge and gently apply pressure on both sides of the tile to snap it along the scored line. Use controlled force and wear protective gear to prevent injury from sharp edges.
For random sizes and shapes for mosaics, use a hammer to break the tile into pieces. Place the tile on a hard surface and wrap it in a newspaper or another soft material to protect your work area from any ricocheting shards. In addition, make sure you position yourself, and anyone else in close proximity, at a safe distance while breaking the tiles.
Here are some creative tile upcycling ideas
Whether you want to tackle a full-blown home improvement project or just decorate your walls, leftover tiles are incredibly versa – TILE! Here are a few things to make with tiles instead of throwing them away.
Tile coasters
Clean and decorate your extra tiles. Attach felt pads or cork backing to the tile’s bottom using epoxy or adhesive to prevent scratching surfaces and provide grip. Apply a clear sealant over the decorated surface to protect it from moisture and wear.
When it’s dry, your coaster is ready to use—place it on surfaces to protect them from hot or cold beverages. You could also make coasters out of old CDs.
Trivets:
Larger tiles can be turned into heat-resistant trivets for placing hot pots and pans. However, I don’t recommend paint or grout for this project as those may not be heat-resistant enough to do the job.
Mosaic Tile Art:
Use broken or cut tiles to create intricate mosaic designs on various surfaces like planters, tabletops, or walls.
Garden Markers:
Paint or label tiles to make durable garden markers for identifying plants. I suggest using plain tiles for this rather than ones that have a pattern on them Use an outdoor-approved marker to write the names of your plants on them. Or check out my post on DIY garden markers from old spoons.
Picture Frames:
Decorate plain picture frames with tiles to add a unique touch. This is a great project for kids. Have them paint the tiles you will use as the frame and then give them as gifts to grandparents with their picture in it.
Key Holder:
Mount tiles on a board with hooks to create a decorative and functional key holder.
Revamp a coffee table with patterned tile
Cover an old table surface with tiles to create a colorful and easy-to-clean tabletop. However, I suggest sealing the grout before using it to make sure it is stain-resistant. A coffee table layered with leftover tile makes a wonderful conversation piece when you have company.
Outdoor Pathway:
Arrange tiles to form a colorful and artistic pathway in your garden. A garden path will need a lot of leftover tile to complete.
Plant Boxes from Ceramic Tiles:
Make a pretty and frugal DIY tile planter box using leftover tiles. To construct a planter box adorned with tiles, gather materials like wood, ceramic tiles, adhesive, grout (optional), and sealant. Assemble the box by cutting and joining wooden panels, leaving the top open for planting.
Clean and arrange tiles on the sides and top, securing them with adhesive and optionally applying grout. After ensuring everything is dry, seal the tiles with a waterproof sealant for protection.
If planting directly, include drainage holes. Fill the planter with soil, plants, and water as needed. Regularly maintain the plants and tiles, reapplying sealant when required. Once completed, position the tiled planter box in your chosen space for an attractive, functional addition.
Kitchen Backsplash:
Create a small, colorful kitchen backsplash using leftover tile. Make sure to use an easy-to-clean grout and seal it well to protect it from kitchen spills.
Revamp Your Bathroom Mirror:
Frame a plain bathroom mirror with tiles to give it a decorative frame. This is a simple yet beautiful guest bathroom idea.
Table Mats:
Glue smaller tiles together to make stylish table mats or placemats. You could also use large floor tiles for this. We have done this one with our dining room and it looks quite lovely.
Drawer Liners:
Here’s an easy DIY project for you. Line drawers with mosaic tiles to protect surfaces and add a pop of color.
Pet Food/Water Bowls:
Wondering what to do with leftover floor tiles? Use larger tiles as bases for pet food and water bowls. This is a great way to use up extra floor tiles, especially those with a smooth finish rather than porous ones.
Decorative Serving Tray:
Jazz up an old serving tray with mosaic tile. Go from plain to pretty with just a little bit of adhesive. You can apply grout in between them or glue them right next to one another, depending on the look you are trying to achieve. Use this tile tray to serve drinks to guests the next time you have company over.
Wall Art:
Arrange individual tiles in a creative pattern and hang them as wall art. Either attach a bracket to the back of each one and hang them individually or glue them to a piece of wood to create a collection instead. Use a strong adhesive so they don’t fall off and break.
DIY Cozy Fireplace:
Use leftover mosaic tile to line the interior of a non-working fireplace for a cozy, decorative touch. Don’t use them in a fireplace you will actually be starting a fire in!
Tiled Vase:
Glue leftover tile onto a plain vase to give it a unique decorative look. You will have to choose a square vase or use very small pieces to ensure a smooth surface when you are done.
Tiled Plant Pot:
Glue tiles to the outside of a planter or pot for an eye-catching display. If you still have extra tiles you can break them into smaller pieces and use them as filler for the bottom of the pot. They make excellent drainage support underneath your layer of soil.
Make Tile Magnets:
Glue small round magnets to the back of the painted tile and use them as fridge magnets. Use a high-quality tile adhesive to make sure your child’s artwork doesn’t fall off the fridge. If you have more of the round magnets, make a few of my bottlecap magnets with them.
Add bling to furniture or decor
Just about any piece of furniture can be given a touch of pizazz with bits of glass, marble, stone, or ceramic. If you have an eye for decorating, perk up a window frame, bathroom bench, or room trim with a bit of old tile.
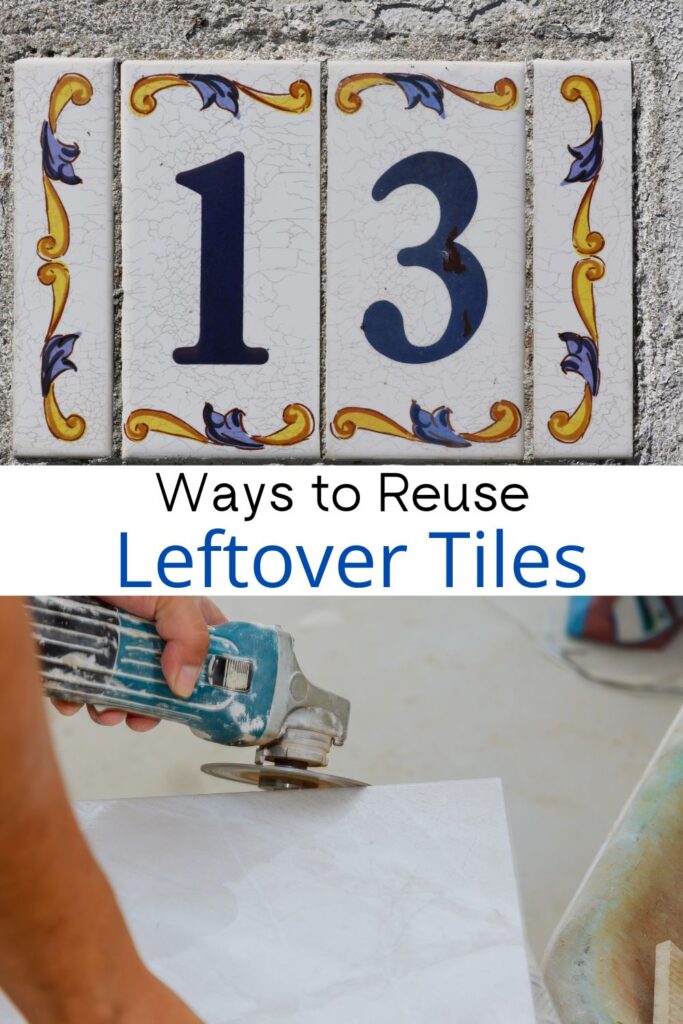
Ceramic Tile House Numbers
Using leftover tiles to create house numbers is a creative and personalized way to enhance your home’s curb appeal. Arrange the tiles in a stylish and easily readable manner, either vertically beside the front door or horizontally above it. Secure the tiles with adhesive or mortar, and consider adding decorative elements like mosaic designs or contrasting grout to make the numbers stand out. This DIY project not only adds a unique touch to your home but also repurposes materials in an eco-friendly manner.
Remember to use appropriate adhesives and consider the tile’s thickness for these DIY tile ideas With a little creativity, you can transform your leftover ceramic tiles into functional and decorative items for your home and garden.

Donating Leftover Tile
If these DIY ideas aren’t your cup of tea, someone else probably wants them for THEIR next project. You can donate leftover tiles to various organizations, schools, community centers, or individuals who may have a use for them.
Donating leftover tiles is a sustainable way to repurpose materials and support creative projects. Local art programs, schools, and community centers might be interested in using them for art projects, mosaic workshops, or other creative endeavors.
Additionally, Habitat for Humanity ReStores and similar nonprofit home improvement stores might accept donations of building materials, including leftover tiles, for resale to fund housing projects.
Before donating, it’s a good idea to contact potential recipients to confirm their willingness to accept the tiles and their specific requirements.
More posts about reusing household items
If you are looking for more information about reusing household items, here are a few posts for you to consider:
- Ways to reuse old tires: Go beyond a tire swing for your kids with some of these tire upcycling ideas.
- What to do with old windows: From stenciling to greenhouses, keep those old windows out of the trash!
- Magazine upcycling ideas: Get crafty with those old magazines this month.
Remember, each and every item that you can keep out of the landfill is a step in the right direction!

Diane is a professional blogger and nationally certified pharmacy technician at Good Pill Pharmacy. She earned her BS in Microbiology at the University of New Hampshire and has worked in cancer research, academics, and biotechnology. Concern over the growing incidence of human disease and the birth of her children led her to begin living a more natural life. She quickly realized that the information she was learning along the way could be beneficial to many others and started blogging and freelance writing to share this knowledge with others. Learn more about her HERE.